Crystal caves, frozen landscapes, and iridescent fire: these are a few of the things that come to mind when you hear the words “Ice Dragon”. Majestic beings of incredible strength, Ice Dragons are living paradoxes: cold-blooded reptiles living in freezing environments. But whether sustained through magic or their own burning souls their powers are undeniable and awesome, so you could imagine my excitement when my wife wanted to not only build her first gaming PC, but one that would bear the name of “Ice Dragon”.
Hey everybody, and welcome to another PC build log!
My wife’s PC build stemmed from opportunity: we’d spoken several years ago about building her one with some extra parts I had in stock but never really got around to it, and the parts were slowly aging out of effectiveness. I would show her cool builds on the internet or she’d see something during her own browsing and the embers would glow warm, but there were always other things that took priority; that is, until I changed jobs. Leaving my old job of almost 10 years opened up some new opportunities for us. One: we had a little more money in our budget, but two: the gaming-tier PC I’d built as my main work-machine was now orphaned and without purpose. This PC was one that predated this website and thus doesn’t have a build log, but was crafted between 2016-2017 and had components circa that time period: a Gigabyte Z170 motherboard, an i7-6700k, 32 GB of G.Skill DDR4 and an EVGA GTX 1060 SC. Powered by an 850W EVGA Supernova P2 and running on a WD Black 512GB NVMe drive this PC–named RuRu Mk2–was capable of running most games with medium-high settings and outclassed my home rig for several years before Maria:Unlocked came into being.
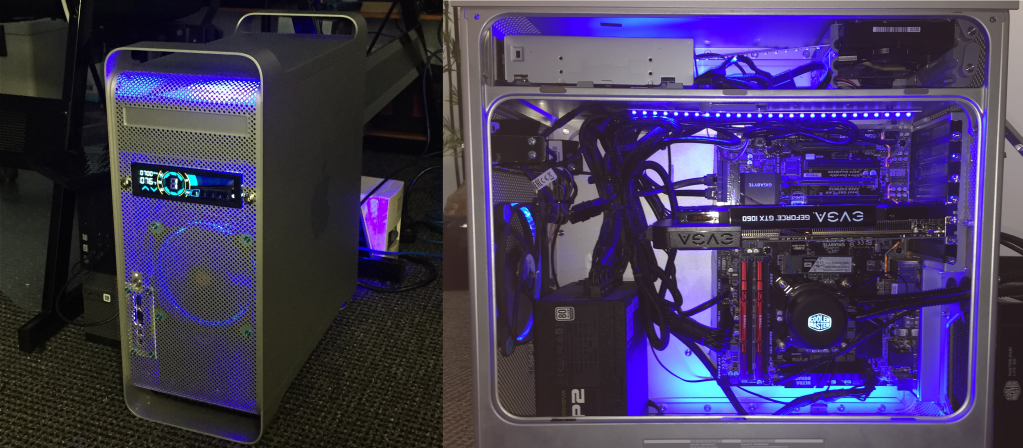
But despite most of the components ready to be used in their current configuration my wife wanted her PC to be a little… different. Okay, a LOT different, but since she’s not a die-hard enthusiast her desires weren’t so much in the specs but in the aesthetics. As such, the first thing to go was the chassis: RuRu had a heavily modded PowerMac G5 chassis–a relic from my early days at that job–and my wife wanted something more elegant than the soft-grey aluminum body with a big ‘ol apple on the side. No, she wanted a Lian Li 011D chassis in white, but due to stock shortages and prices she settled on the 011D XL ROG chassis in white. We salvaged the GPU and the PSU, but instead of the metallic red RAM she opted for 2×16 GB sticks of G.Skill’s Trident Z Royal DDR4. To continue the theme she wanted a white motherboard instead of the black and red one so we bought an Asus Prime Z390-A in white.
With her modest hardware specs there really wasn’t a need for watercooling other than maybe an AIO for the CPU, but because it “looks really pretty” she wanted a full distribution plate and hard-tubing setup. However, when we were unable to get the 011D and instead went with the XL she wasn’t able to get the distro-plate for it and opted for a Lian Li Galahad 360 supported by extra fans: a three-pack of Lian Li UNI FAN SL120.
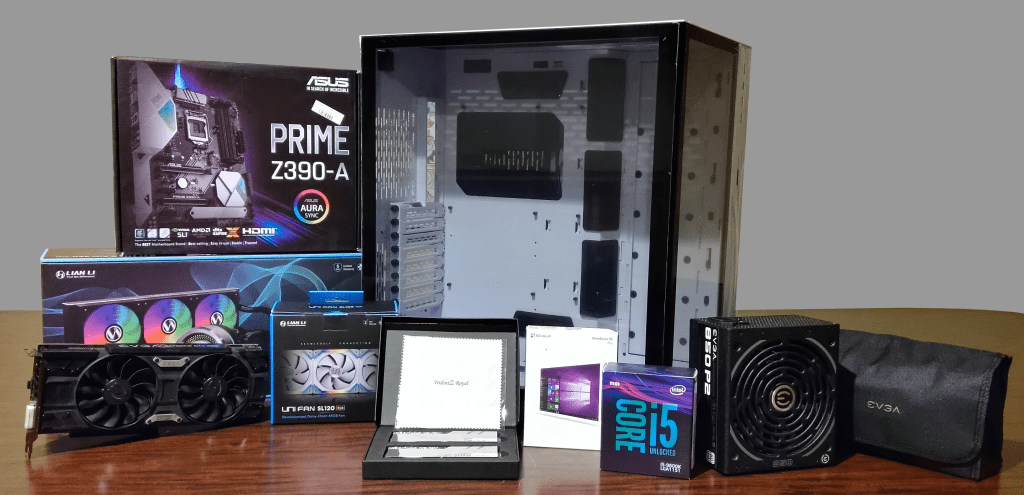
If you noticed the i5 in the above photo instead of the aforementioned i7 you’re probably scratching your head, but trust me, I had good reason! Ru-Ru’s i7-6700K was a 4C/8T chip with an advertised base clock of 4GHz and a boost of 4.2GHz before any overclocking, but with my awful luck at the “silicon lottery” mine couldn’t hold a solid OC at anything over 4.1GHz on all cores, and that was with a CoolerMaster AIO. This i5-9600K on the other hand was a 6C/6T 9th Gen chip that had a max turbo of 4.6GHz without an overclock that it could reach! Coupled with the level of demand this PC was going to have I felt pretty confident using the i5.
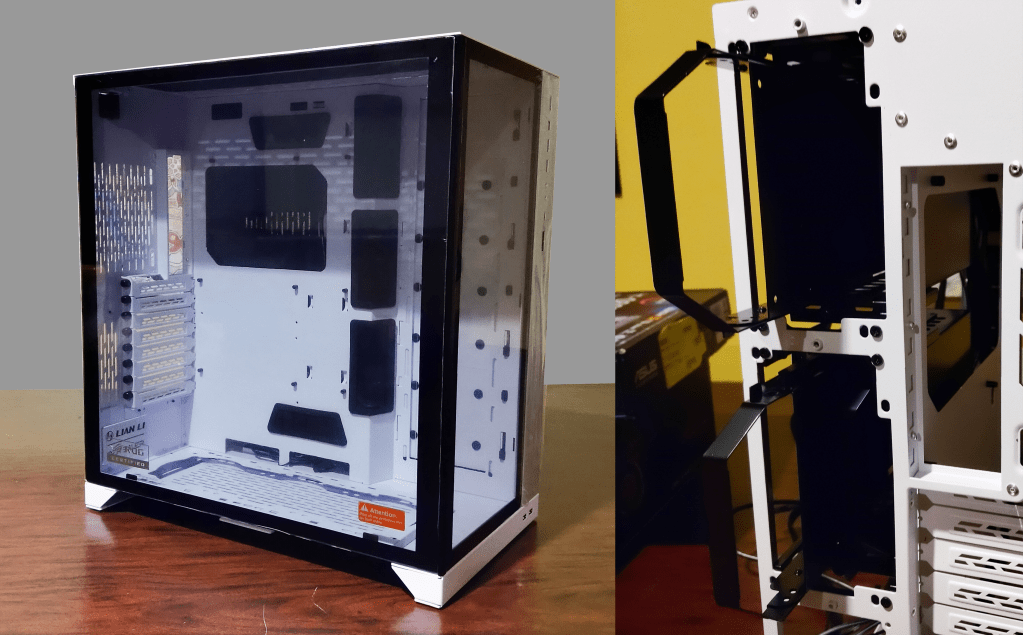
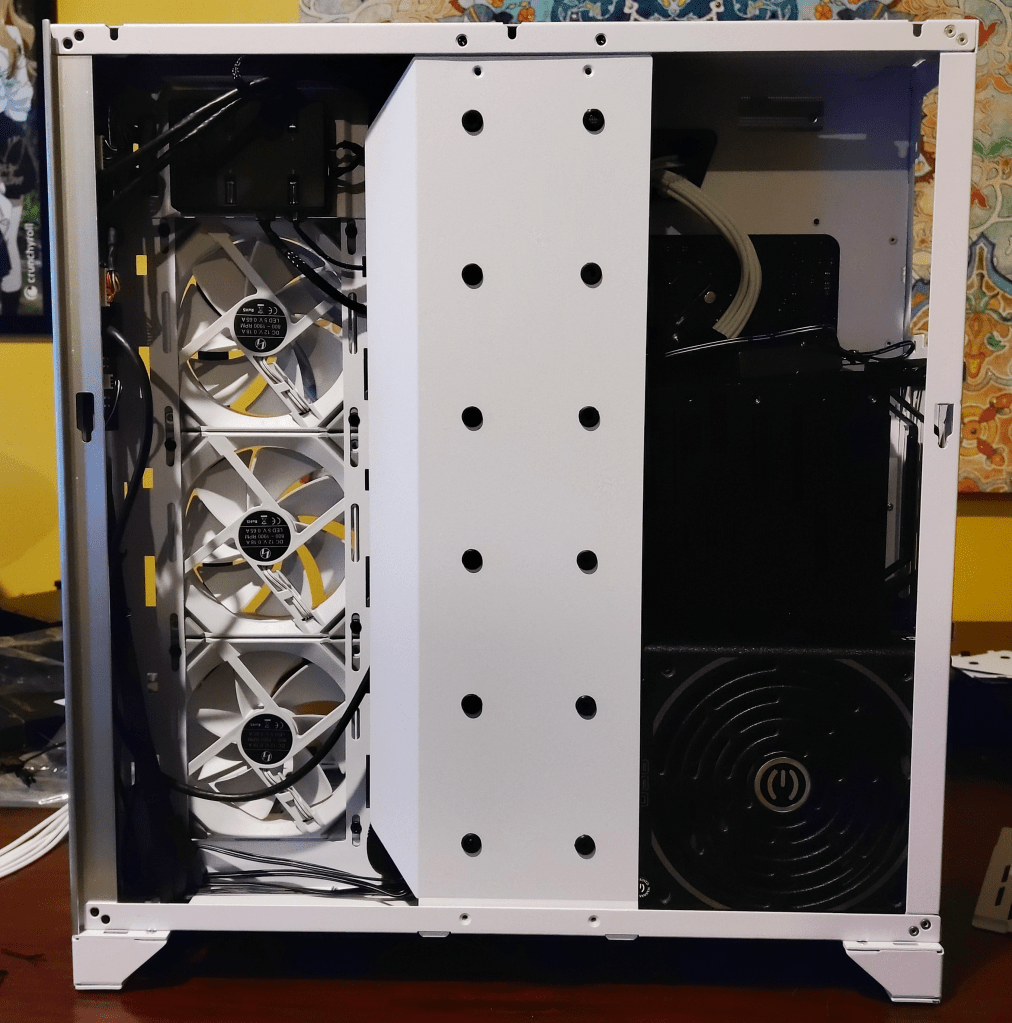
First off, this was my first time building in a Lian Li chassis and I was very impressed! I like large chassis anyway (looking at you, Maria…) so using the XL was a lot of fun, but Lian Li really knocks it out of the park with their designs. The rear-facing drive bays were incredible: 4x SATA bays for either 3.5″ or 2.5″ drives, hidden away in the rear of the chassis but easily accessible if you need to swap anything and removable if you don’t need them! For this build we were only going to use two SATA drives, so removed the upper bay to make way for a little more room for cable management.
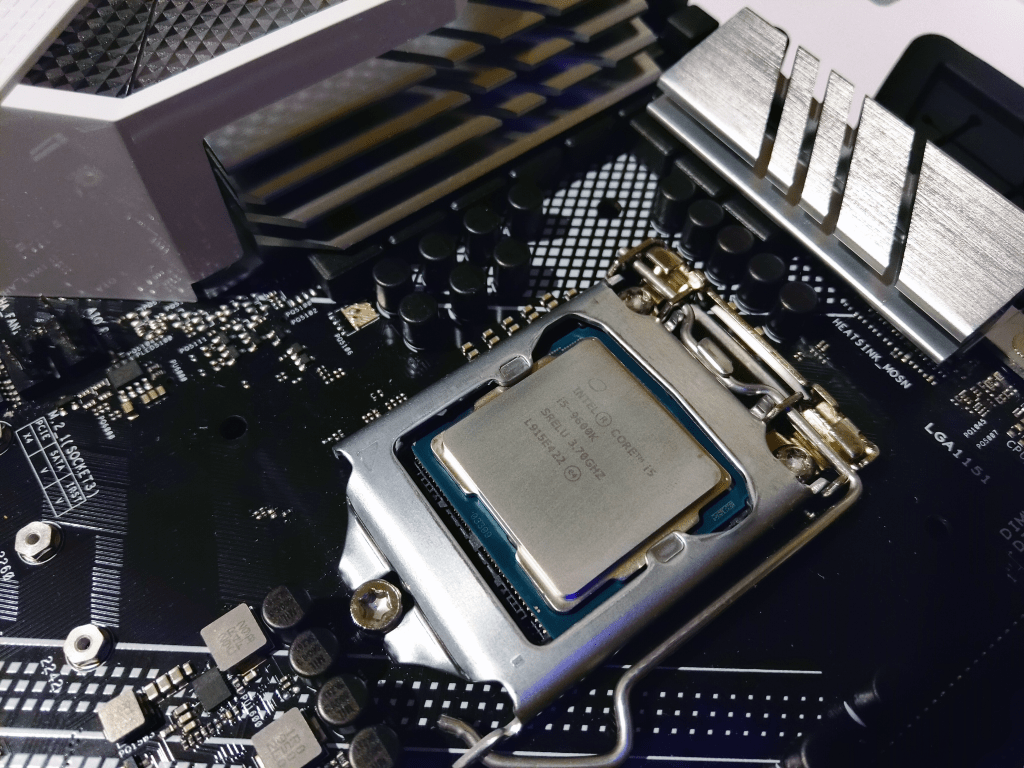
Now that we’re done with the Lian Li plug, on to the building! Unwrapping the Motherboard I like to use the box it came in as a table, setting the anti-static bag on top and then laying the motherboard on top of that. Unclasping the CPU socket cover we place in our lovely i5-9600K and close the lid. This motherboard came with the plastic pin cover to protect the socket during shipping, and that pops right out as you close the lid over the new CPU.
Some builder like to also add their coolers to the motherboard before placing it into the chassis; I am not one of those people. So into the chassis it goes with a loose CPU power cable to check cable lengths.
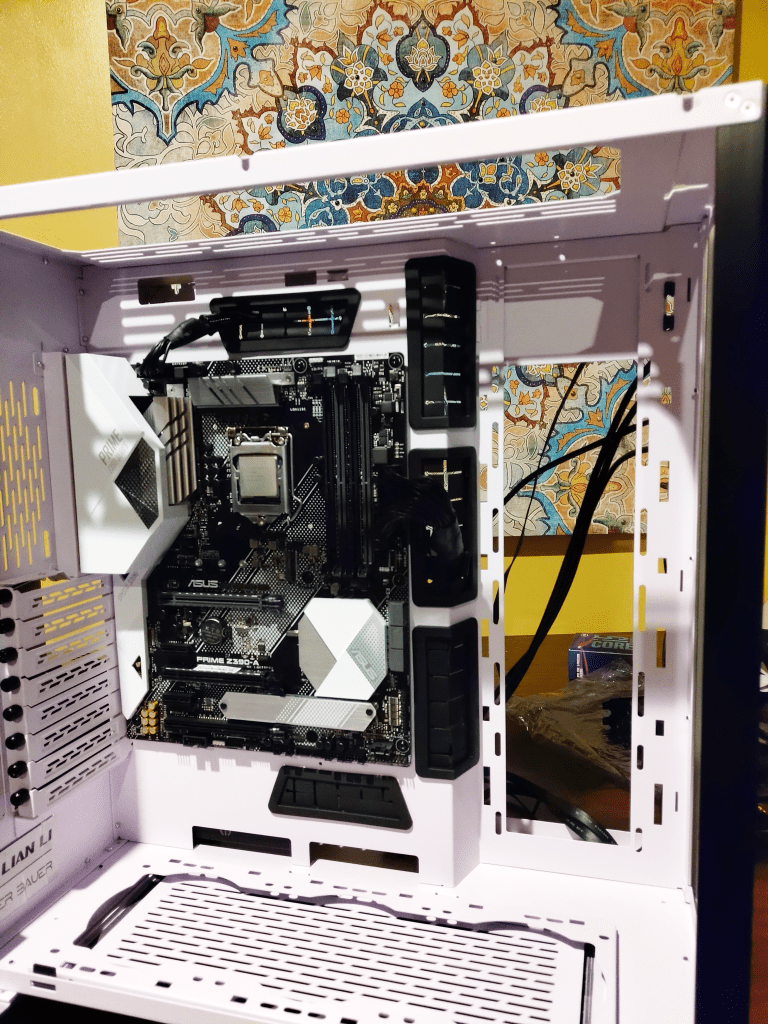
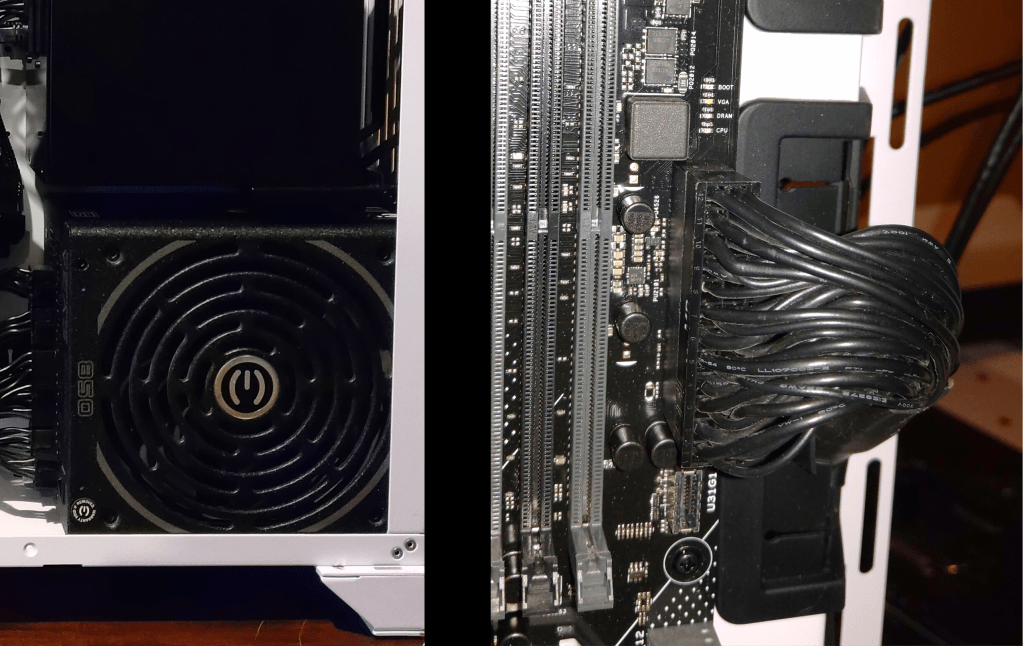
Cable lengths looked good so I installed the PSU into the chassis. The ROG XL has a vertical mount instead of the usual horizontal mounts, but it tucks in nicely in the rear of the chassis below those lovely drive bays. And with the PSU installed it was time to snake in that most obnoxious of cables, the 24-pin ATX cable…
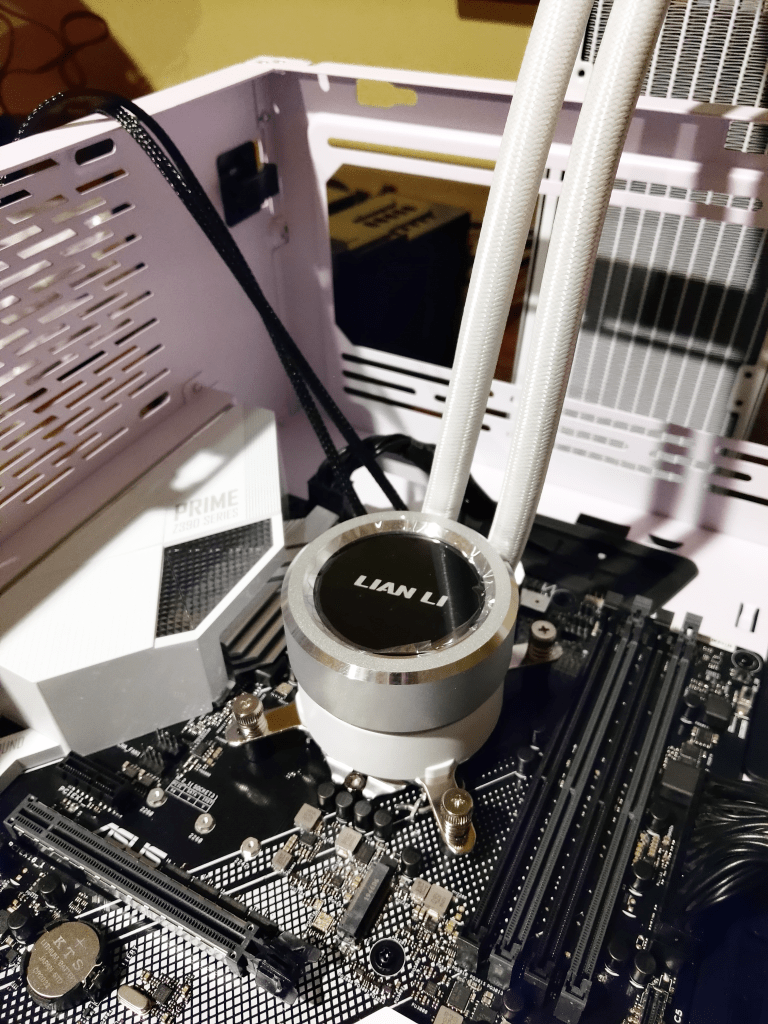
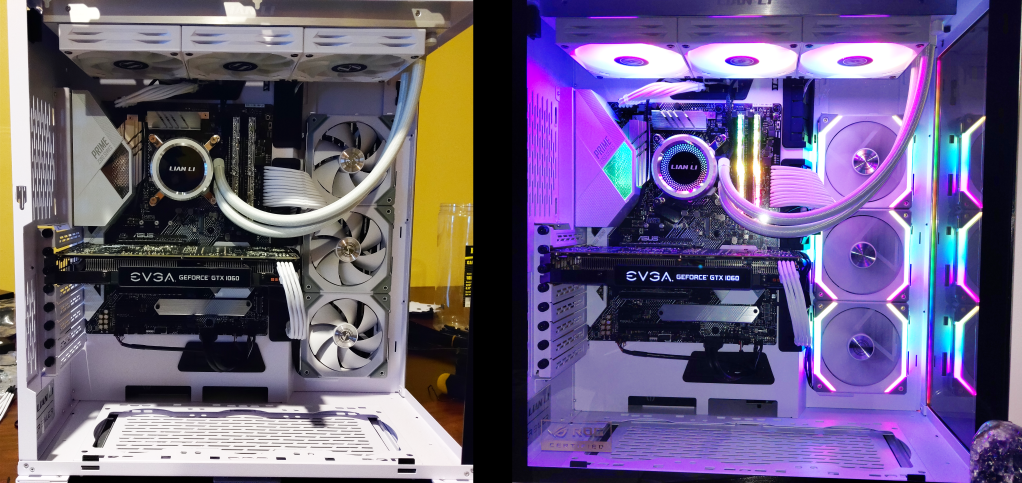
Next up was a test-fit of the AIO, the Lian Li Galahad 360. The CPU block fit nicely, but after placing the reservoir my wife preferred the piping coming from the side and swinging down. I removed the AIO, installed the Trident Z Royal, and then placed the AIO back in how she preferred. One final look-over and she approved the design.

The Galahad brought several cables along with it (RGB control, pump control, 3x fan power, 3x fan RGB) so I went ahead and started some cabling. The above image shows the radiator fans, CPU block, front panel, front audio, USB 3.0, USB 3.1 Gen 2, CPU power, and ATX power all wired up. The fans for the radiator were placed in a pull configuration, taking the chassis air and expelling it over the radiator.
The Galahad was a bit tough, but only because my wife wasn’t sure if she wanted a master RGB controller for everything or the individual controllers for each set of components. The Galahad comes packaged with three RGB fans and thus has a controller to manage the fans’ RGB as well as the CPU block’s RGB, and the PWM of the fans. And by “controller” I mean a web of cables that interconnect in interesting ways. Lian Li’s included instructions were very helpful, and after a few comparisons against the cables in front of me I was able to get it wired up correctly and tucked away in the rear of the chassis.
Taking a break from cable management I removed the M.2 heatsink on the Motherboard (the long silver plate below the southbridge heatsink) and installed the 512GB WD Black NVMe SSD. I also placed the 1TB WD Blue SATA SSD and the 3TB WD Red HDD into the rear drive bay (these will be the game storage drive and the data drive respectively). Next was the 3-pack of Lian Li UNI FAN SL120 chassis fans also placed into a pull configuration. These particular fans are designed to clip together with electrical contacts, eliminating the need for separate cables for each fan which is a cable management dream!
Lastly, I installed the GPU: an EVGA GTX 1060 SC. This card overclocks very well despite already being factory overclocked, and I’ve been able to get it to a stable 1974/4006MHz when it was part of Ru-Ru Mk2.
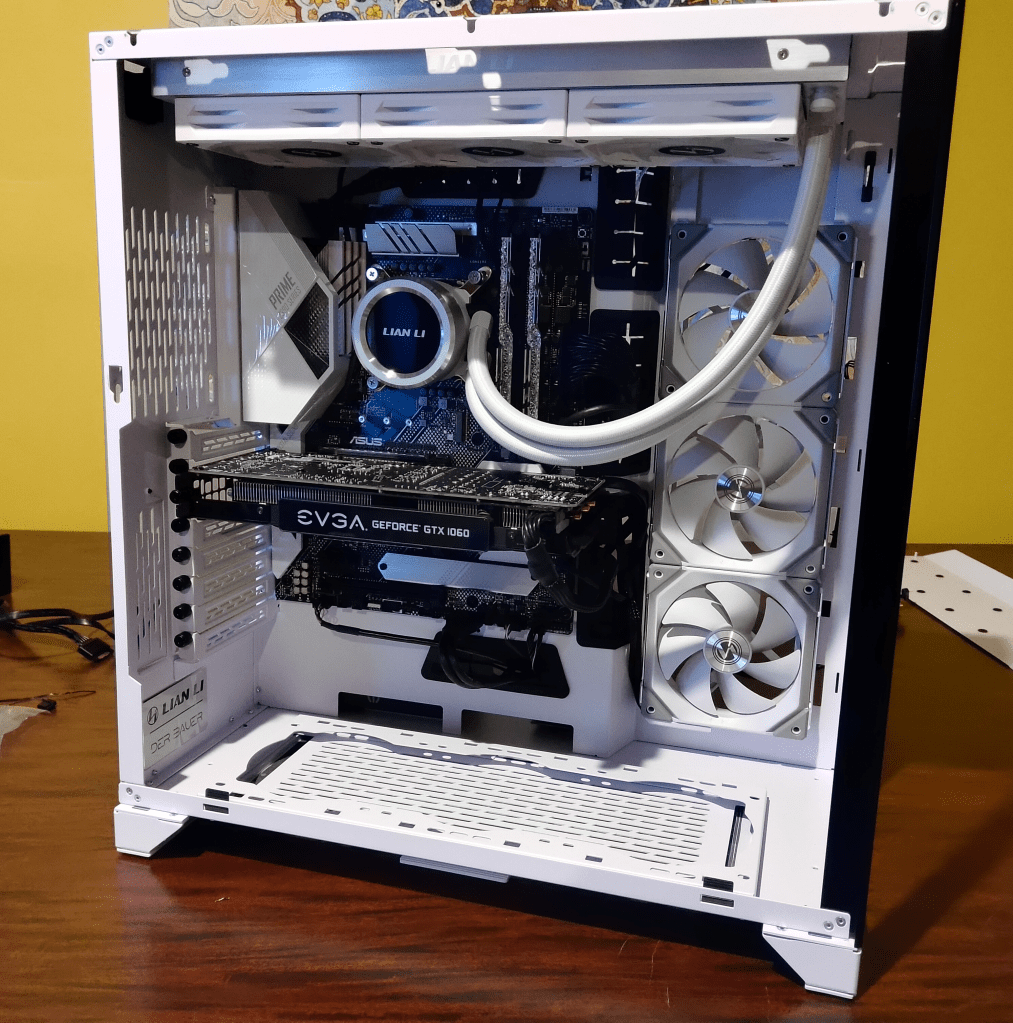
With all of the components installed it’s now time to wrangle all those cables! I’d done a little management during the building process, but as anyone wo’s built a PC knows you can’t really map everything out until the last little fan cable is in place. Luckily for me the ROG XL has SO MUCH SPACE (have I mentioned that yet) that cable management was not as bad as it could be.
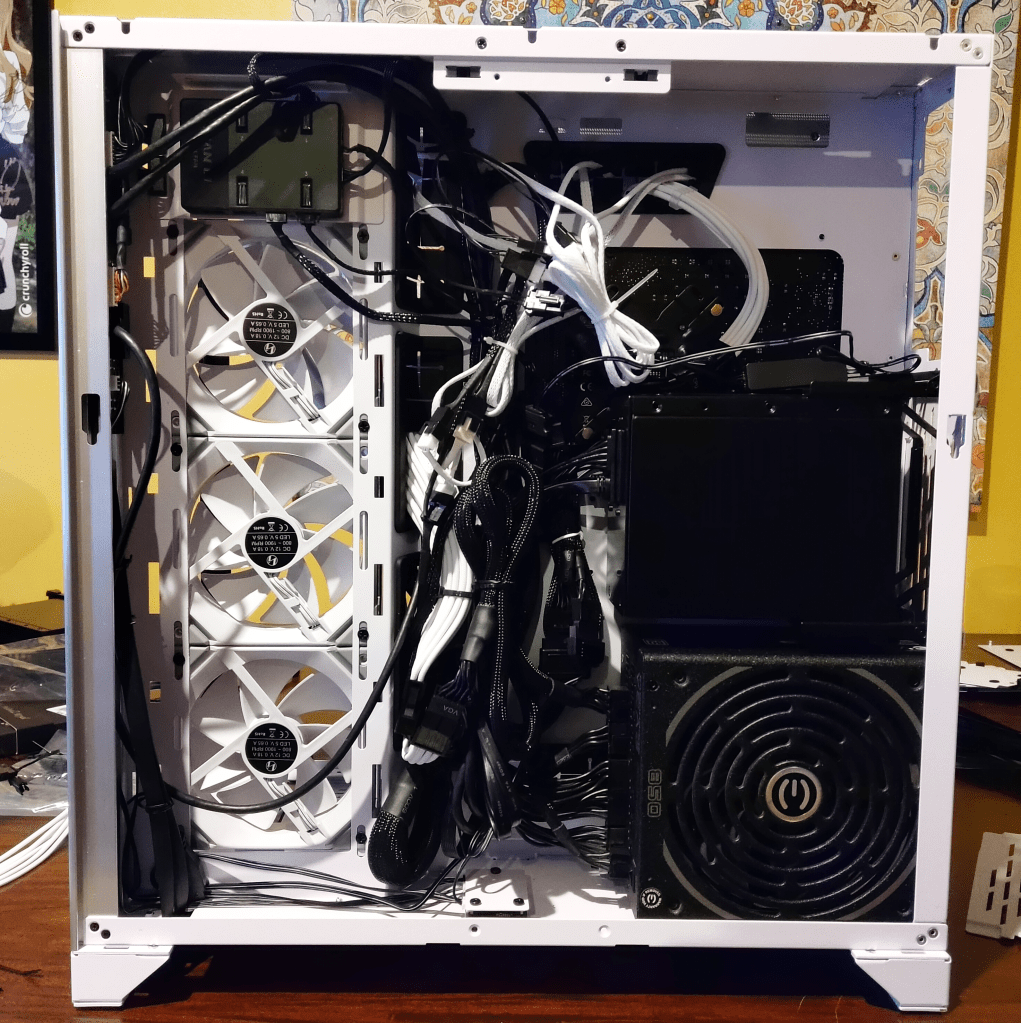

And voila! A beautiful Lian Li ROG XL chassis complete with Lian Li fans and AIO! There are a few bits and bobs I’d like to add to it (right-angle USB 3 connector, a few other adapters) but my wife’s main concern was the color of the cables! The black CPU, ATX, and GPU power cables were very unappealing, so we bought some AsiaHorse sleeved cable extensions in white which changed the feel of the PC immediately.
Overall the building was smooth with few hiccups, but we did run into problems when booting. The memory didn’t want to play nicely with the motherboard, and after a lot of troubleshooting with MEMOK on and off, BIOS updates, and even different RAM sticks we couldn’t get Windows to load properly. I was able to get it installed, but after a few days the PC kept crashing to a BSOD and was eventually unrecoverable. I’d had good results with Asus Customer Service before so I reached out to them with a warranty claim. They handled the transaction wonderfully and after about a week of downtime we had a replacement board that had no problem booting up and installing Windows. Thanks for your excellent customer support, Asus!
We’ll eventually be adding another set of Lian Li UNI FAN SL120 on the bottom of the chassis (for aesthetics, really) in a push configuration to get air from below the chassis pushed inside to feed the GPU and radiator fans. As it sits right now the pull fans are sucking in air from the passive vents on the chassis which should be enough for my wife’s needs, but she would like the extra pop of color in that empty space on the bottom.
That wraps up this build log for the Ice Dragon. I’ll update the log with pictures of the bottom fans when they get installed, and with any major changes we make to this PC. But I want to thank everyone for stopping by and taking the time to peruse this log; it was a fun build and I know my wife is happy with the result!

Leave a comment